- How do installers check if my roof is strong enough for solar panels?
- How are solar panels installed on a roof?
- How long does a solar panel installation take?
- Can I install solar panels on my own?
- Do I need planning permission to install solar panels?
- How are solar panels connected to my house?
- Summary
- Setting up solar panels can be done in seven simple steps
- Solar panel installations typically take about two days to complete
- Get a certified solar panel installer to carry out the job
Solar panels can help reduce your monthly energy bills by 50% from day one, according to The Eco Experts’ 2024 National Home Energy Survey.
The break-even point for solar panels is about 15 years, 10 years earlier than their 25-year average lifespan.
Before making your decision, it’s important to not only research how to choose a solar panel installer, but understand the installation process.
You should also know how many solar panels you’ll need.
But if you have any concerns or have questions about the process, we’ll aim to address them in this guide.
If you’re clued up on the solar panel installation process, and you’re ready to invest, we can help. Simply use our easy-to-navigate tool by filling in a few quick details and our expert suppliers will be in touch.

How do installers check if my roof is strong enough for solar panels?
The installer (or a dedicated surveyor) should always make sure the roof is strong enough before proceeding with a solar panel installation.
How they’ll do this depends on the type of roof, but it usually leads to a positive conclusion. Most modern roofs can hold much heavier objects than solar panels – such as people – because they come with trussed rafters.
If the installer has any doubts, they’ll consult a qualified structural engineer.
How are solar panels installed on a roof?
Despite being intricate bits of kit that can generate electricity from the sun, solar panels are pretty straightforward for a professional to set up.
Before an installer is able to crack on with the actual installation, a professional surveyor will need to go into your loft and check the integrity of both the roof and the rafters. This is a key part of the process, as they will assess whether it’s safe for you to have solar panels on your roof.
It’s important this is carried out by an MCS-certified surveyor – otherwise it could be done poorly, leading to damages that can increase your costs over time.
After the survey, professionals will be able to start the process. If you want to choose a top engineer for the job, check out our guide to the best solar panel installers.
Here is a short overview of eight simple steps an installer will take:
The solar panel system is tested – Once the installer has finished all these steps, the last thing they’ll do is make sure the system is working properly. This involves switching the power back on and monitoring each part of the system to make sure things are working.
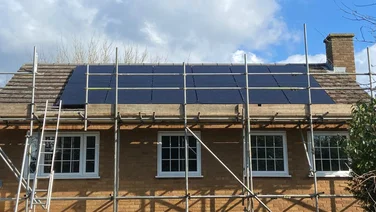
The scaffolding is set up – This step will take the longest out of the entire process, usually about a day. It requires your installer to construct scaffolding around the building so they can crack on with the installation.
Roof anchors are attached – Solar panels stay on the roof through roof anchor points. The installer will have to lift some of the roof tiles to fix the anchors to the rafters in the loft. This will give the solar panel mounts a stable foundation, and will make sure they don’t get damaged in stormy weather.
Solar panel mounts are secured – Once the roof anchors have been fixed to the property, the installer will attach the solar panel mounting system to them. The framework will run both vertically and horizontally across the roof, and will support the base of the solar panels.
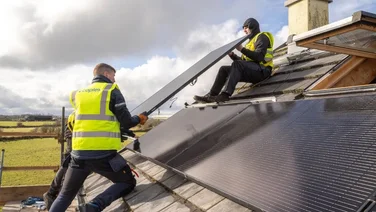
The solar panels are installed – Once the mounting system is set up, it’s time to get the solar panels on the roof. The installer will start by placing the solar panels onto the mounting system, without fully securing them just yet. Once they’re happy with the angle of the panels, they will tighten all the nuts and bolts to secure them in place.
An inverter is wired to the solar panels – Most panels come pre-wired from the manufacturer, which means they just need to be connected to the inverter. It’s worth bearing in mind that smaller solar panel systems connect a single series of wires to the inverter, while larger systems connect several parallel wires. Overall, the inverter should take four-to-six hours, depending on the system.
The inverter is connected to the consumer unit – The inverter is then connected to a circuit-breaker in your consumer unit to allow the electricity to power your home. The installer will also usually connect a generation meter to the system at this point, which will monitor the amount of electricity your solar panels produce.
Optional – the inverter is connected to the solar battery – Some people also decide to pair their panels with a solar battery, which will store excess solar energy to be used on cloudy days or during the night time.
Where do you want to install solar panels?
Get startedHow long does a solar panel installation take?
Solar panel installations typically take about two days to complete.
Most of this time is taken up by constructing the scaffolding, which means if you’re not installing your panels onto your property’s roof, it’ll take much less time. For example, solar panels can also be mounted on a wall.
Once the scaffolding is up, the panels are usually installed in less than a day.
The total time it takes can be affected by the type of property, the size and complexity of the solar panel system, as well as any unexpected, dangerous weather conditions.

Can I install solar panels on my own?
Technically, yes, you can install solar panels on your own – but we strongly discourage you from doing so, unless you’re a certified installer.
You’ll need expertise in roofing and electrical work, as well as specialist equipment and – in most cases – scaffolding.
If you go ahead and install your solar panels, you might not do it at the standard you’d ideally want – not to mention you could fall and hurt yourself or, worse, cause a house fire.
Your local electricity network operator could also disconnect you if the correct certifications and notifications aren’t in place, and you won’t be able to sell your excess energy through the Smart Export Guarantee.
For the average three-bedroom household, this could mean missing out on £160 per year, on average, for no good reason.
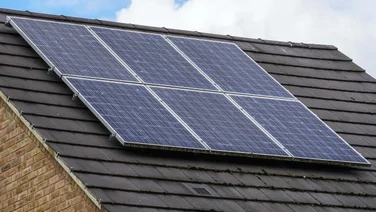
The panels themselves can be installed vertically or horizontally.
Do I need planning permission to install solar panels?
Largely, you won’t need planning permission to install solar panels, but there are exceptions.
If you live in a listed building or live in a conservation area, it’s likely you’ll need planning permission as it alters the preserved area or home.
Similarly, flats might need planning permission, too.
Before going ahead with installation, check out your local council’s website for up to date information, or ask your installer.
How are solar panels connected to my house?
Solar panels are connected to your house in two ways: an electrical connection and a mechanical connection.
Here’s how both of these work, and what it means for your house:
Mechanical connection – Your installer will mechanically connect the solar panels to your home with steel or aluminum hooks that poke through under the roof tiles and are secured to the rafters in your loft. If your tiles are made of slate, your installer will need to take special care. You might want to supervise them during this part of the process, to ensure they don’t cause any damage.
Electrical connection – Your installer will connect the solar panels to the inverter through a series of wires that will travel through your roof. The inverter will usually be placed in your loft, near the breaker panel, where it will take the DC power the panels supply and convert it into usable AC electricity. A cable will then take the electricity to your fuse board. There will also be an additional circuit breaker so you can control the flow of solar electricity.
Summary
- Solar panels can help reduce your monthly energy bills by 50% from day one
- The break-even point for solar panels is approximately 15 years, 10 years earlier than their 25-year average lifespan
- The installer (or a dedicated surveyor) should always make sure the roof is strong enough before proceeding with a solar panel installation
- Before an installer is able to crack on with the actual installation, a professional surveyor will need to go into your loft and check the integrity of both the roof and the rafters
- Solar panels are connected to your house in two ways: an electrical connection and a mechanical connection
- Solar panel installations typically take about two days to complete.

